The Gigabyte B650 Gaming X AX motherboard is a high-performance platform designed for AMD Ryzen 5, 7, and 9 7th Gen processors, featuring Socket AM5, DDR5 memory support, and PCIe 5.0 connectivity. It offers Wi-Fi 6E and Bluetooth for enhanced wireless connectivity, along with robust power delivery and cooling solutions, making it ideal for gaming and content creation. The motherboard is available in two versions, V2 and standard, ensuring compatibility with the latest hardware and software needs, providing a versatile and reliable foundation for modern PC builds.
1.1 Key Features and Specifications
The Gigabyte B650 Gaming X AX motherboard boasts an AM5 socket, supporting Ryzen 5, 7, and 9 7th Gen CPUs. It features four DDR5 DIMM slots with up to 128GB RAM capacity, PCIe 5.0 x16 for graphics, and M.2 slots for NVMe SSDs. Wi-Fi 6E and Bluetooth 5.2 ensure fast wireless connectivity. The board includes robust VRM cooling, high-quality audio capacitors, and RGB Fusion lighting. It supports overclocking and offers ample I/O ports, including USB 3.2 Gen 2 and HDMI 2.1, making it versatile for gaming and content creation.
1.2 Compatibility with AMD Processors
The Gigabyte B650 Gaming X AX motherboard is specifically designed for AMD Ryzen 5, 7, and 9 7th Gen processors, utilizing the Socket AM5 platform. It supports DDR5 memory and PCIe 5.0, ensuring optimal performance for AMD’s latest CPUs. The motherboard is compatible with Ryzen processors featuring up to 16 cores and 32 threads, making it a robust choice for both gaming and high-performance computing tasks. Its design ensures seamless integration with AMD’s latest technologies, delivering reliable and efficient processing power.
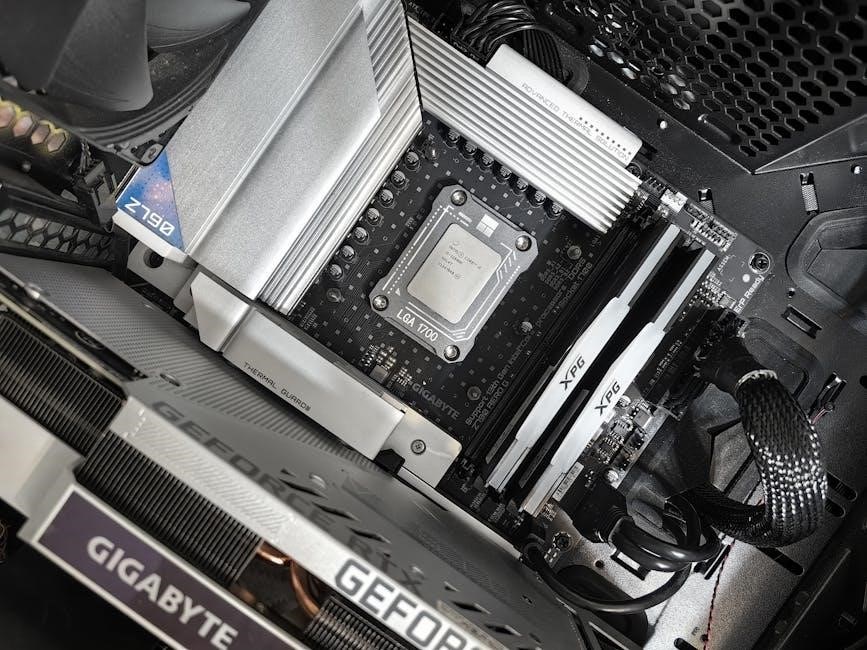
1.3 Overview of the Motherboard Layout
The Gigabyte B650 Gaming X AX motherboard features a Socket AM5 design, supporting Ryzen 5, 7, and 9 7th Gen processors. It includes four DIMM slots for DDR5 memory, PCIe 5.0 x16 slots for graphics cards, and multiple M.2 slots for NVMe SSDs. The layout also incorporates robust VRM cooling, RGB lighting, and essential onboard buttons like power and reset; The back panel provides HDMI, DisplayPort, USB 3.2 Gen 2 ports, and high-speed audio connectors, ensuring comprehensive connectivity for gaming and productivity needs.

Motherboard Layout and Components
The Gigabyte B650 Gaming X AX features Socket AM5, supporting Ryzen 5000 and 7000 series processors. It includes DDR5 memory slots, PCIe 5.0 expansion slots, and M.2 NVMe storage options. The layout incorporates RGB Fusion lighting, high-quality audio capacitors, and robust power delivery components. The back panel offers USB 3.2 Gen 2 ports, HDMI, and DisplayPort, ensuring versatile connectivity for peripherals and displays, while maintaining a sleek and functional design.
2.1 Back Panel Connectors
The Gigabyte B650 Gaming X AX motherboard features a comprehensive array of back panel connectors, including USB 3.2 Gen 2 ports, HDMI, DisplayPort, and Ethernet. These ports provide versatile connectivity options, catering to both gaming and productivity needs. The USB ports support high-speed data transfer, while the HDMI and DisplayPort ensure crisp, high-resolution display output. The Ethernet port offers reliable wired internet connectivity, and additional audio jacks provide immersive sound experiences, making it a well-rounded solution for modern PC setups.
2.2 Onboard Buttons and LEDs
The Gigabyte B650 Gaming X AX motherboard features essential onboard buttons and LEDs for convenient system management. It includes a power button for easy startup, a reset button to reboot the system, and a BIOS reset or clear CMOS button to restore default settings. LEDs provide visual feedback, such as power status, HDD activity, and diagnostic indicators for CPU and memory. These components are strategically placed for easy access, enhancing user experience with quick controls and visual monitoring, ideal for both novice and experienced users.
2.3 Internal Connectors
The Gigabyte B650 Gaming X AX motherboard offers a comprehensive array of internal connectors for versatile system configuration. It includes an AM5 CPU socket supporting Ryzen 5, 7, and 9 7th Gen processors, four DDR5 DIMM slots for up to 128GB of memory, and multiple M.2 slots for NVMe SSDs. Additional connectors such as SATA ports, an 8-pin EPS power connector, and 24-pin ATX power input ensure reliable power delivery. Fan headers, RGB lighting connectors, and USB ports provide enhanced customization and peripheral support, catering to both enthusiasts and casual users.
Installation Guide
Install the Gigabyte B650 Gaming X AX motherboard by preparing the case, ensuring compatibility, and following step-by-step instructions for CPU, memory, and storage installation; Secure the motherboard, connect essential cables, and power components safely for a stable system setup. Refer to the manual for detailed guidance on each installation phase to ensure proper functionality and system optimization. This guide ensures a smooth and error-free installation process.
3.1 Preparing the Computer Case
To prepare the computer case for the Gigabyte B650 Gaming X AX motherboard, ensure the PC is powered off and unplugged from the electrical outlet. Ground yourself by touching a metal object or wear an anti-static wrist strap to prevent damage from static electricity. Remove the side panel of the case using the provided screws. Check the case for compatibility with the ATX form factor and ensure the stand-offs for the motherboard are correctly positioned. Clean the case of dust and debris, and organize cables for a neat installation. This step ensures a smooth and safe motherboard installation process.
3.2 Installing the Motherboard
Begin by aligning the Gigabyte B650 Gaming X AX motherboard with the case stand-offs, ensuring proper fitment. Gently lower the motherboard into the case, securing it with screws. Tighten the screws in a star pattern to avoid warping. Connect the CPU power cable to the 8-pin EPS connector and insert the RAM into the DIMM slots at a 45-degree angle. Ensure all internal connectors are securely attached, such as the CPU fan and front panel headers. Double-check all connections before proceeding to the next step.
3.3 Connecting Essential Cables
Connect the CPU power cable to the 8-pin EPS connector near the CPU socket. Attach storage drives to SATA or M.2 ports, ensuring proper alignment. Link case fans to fan headers and connect the front panel header to the motherboard. Securely plug in USB and audio cables from the case to designated ports. Verify all connections are tight and correctly oriented to prevent damage. If your case has RGB lighting or additional features, connect those to the motherboard’s RGB or USB headers for full functionality.

BIOS Setup and Configuration
Access the BIOS via the DEL or F2 key during boot. Navigate settings using arrow keys and configure options like overclocking, memory timings, or boot order. Save changes before exiting to ensure settings are applied.
4.1 Accessing the BIOS
To access the BIOS on the Gigabyte B650 Gaming X AX motherboard, restart your PC and press the DEL or F2 key repeatedly during boot. Ensure the keyboard is connected and recognized. Timing is critical—press the key when the POST screen appears. Once inside, use arrow keys to navigate and configure settings like boot order, memory profiles, or overclocking options. Save changes with F10 before exiting to apply configurations.
4.2 Navigating BIOS Settings
Navigate the BIOS using arrow keys to explore menus like M.I.T., Advanced VCore, and Memory Settings. The Q-Flash Plus button allows BIOS updates without a CPU or GPU installed. Use F10 to save changes or ESC to exit menus. Customize settings for overclocking, memory profiles, or boot priority. The intuitive interface simplifies adjustments, ensuring optimal system performance. Explore tabs for detailed configurations and utilize built-in help tooltips for guidance.
4.3 Saving BIOS Configuration
To save your BIOS configuration, navigate to the Save & Exit tab. Select Save Changes and confirm to apply your settings. Use the F10 key to save and exit. Ensure all changes are confirmed before exiting. Saving your configuration ensures stability and maintains optimized settings for your system. Always save changes before exiting the BIOS to avoid losing custom configurations. This step is crucial for preserving overclocking profiles, memory settings, and other customizations.

Overclocking Features
The Gigabyte B650 Gaming X AX offers robust overclocking tools, including CPU and memory tuning options, intuitive BIOS interfaces, and real-time monitoring for stable performance optimization.
5.1 CPU Overclocking Options
The Gigabyte B650 Gaming X AX motherboard provides extensive CPU overclocking options through its BIOS, allowing users to fine-tune voltage, frequency, and performance settings. Features like Precision Boost Overdrive (PBO) enable dynamic voltage and frequency adjustments for optimal performance. The BIOS also includes detailed monitoring tools to track real-time CPU parameters, ensuring stable overclocking. These features cater to enthusiasts and gamers seeking to maximize their AMD Ryzen 7th Gen processors’ potential without compromising system stability.
5.2 Memory Overclocking Support
The Gigabyte B650 Gaming X AX motherboard supports DDR5 memory overclocking with compatibility for XMP and A-XMP profiles, enabling enhanced performance. Users can adjust memory voltage, frequency, and timing parameters through the BIOS for optimal stability. The motherboard features four DIMM slots, supporting up to 128GB of RAM. Advanced cooling solutions and robust power delivery ensure reliable operation during high-speed memory overclocking, making it ideal for gamers and enthusiasts seeking peak system performance.
5.3 Stability and Monitoring Tools
The Gigabyte B650 Gaming X AX motherboard features robust stability and monitoring tools, including RGB Fusion for customizable lighting and Smart Fan controls for optimal cooling. The BIOS provides detailed voltage monitoring and temperature sensors for real-time system tracking. Additionally, Gigabyte’s proprietary software offers tools like HWMonitor and System Information Viewer, enabling users to monitor and adjust system parameters for enhanced performance. These features ensure stability during overclocking and provide comprehensive insights into system health, making it ideal for both gaming and content creation workloads.
Troubleshooting Common Issues
The Gigabyte B650 Gaming X AX motherboard includes diagnostic LEDs and beep codes to identify common issues like power failures or component malfunctions. The manual provides detailed troubleshooting guides to resolve BIOS errors, RAM compatibility problems, and boot failures, ensuring users can quickly identify and fix issues, optimizing system performance and stability.
6.1 Identifying Common Problems
The Gigabyte B650 Gaming X AX motherboard features diagnostic LEDs and beep codes to help users identify common issues. These tools can indicate problems such as power failures, component malfunctions, or boot errors. Users can refer to the manual for detailed troubleshooting guides, addressing specific issues like no power, boot failures, or RAM compatibility. By understanding the LED patterns and beep codes, users can quickly diagnose and resolve problems, ensuring optimal system stability and performance.
6.2 Diagnostic LEDs and Beep Codes
The Gigabyte B650 Gaming X AX motherboard includes diagnostic LEDs and beep codes to help identify system issues. These indicators provide visual and auditory cues for troubleshooting common problems like power failures, RAM incompatibility, or boot errors. The diagnostic LEDs are located on the motherboard and display specific patterns corresponding to different issues. Beep codes offer additional auditory feedback, with sequences signaling hardware malfunctions. Referencing the manual is essential for accurately interpreting these signals and resolving issues efficiently. This feature ensures quick diagnosis and minimizes downtime for users.
6.3 Resetting BIOS to Default Settings
To reset the BIOS to default settings on the Gigabyte B650 Gaming X AX motherboard, enter the BIOS setup utility by pressing the designated key (usually F2, Del, or End) during boot. Navigate to the “Load Optimized Defaults” or “Restore Defaults” option and select it. Save and exit the BIOS setup. Additionally, some motherboards feature a hardware jumper to reset BIOS settings. This feature is useful for troubleshooting or reverting changes, ensuring system stability and proper functionality. Always refer to the manual for specific instructions.
Software and Driver Installation
This section covers installing drivers, software, and firmware for the Gigabyte B650 Gaming X AX motherboard, ensuring optimal performance and compatibility with the latest hardware and features.
7.1 Downloading Drivers from Gigabyte
To ensure optimal performance, download the latest drivers and software for the Gigabyte B650 Gaming X AX motherboard from the official Gigabyte website. Navigate to the “Support” section, select your motherboard model, and choose the appropriate operating system. Download the chipset, audio, LAN, and Wi-Fi drivers, as well as utility tools like GIGABYTE Driver Installer. Always use genuine drivers to maintain compatibility and functionality. Regularly check for updates to keep your system up-to-date with the latest features and improvements;
7.2 Installing Motherboard Software
Install essential software and utilities for the Gigabyte B650 Gaming X AX motherboard by downloading them from the official Gigabyte website. After downloading, run the installer and follow the on-screen instructions to install drivers and utilities like GIGABYTE App Center, RGB Fusion, and Smart Fan. Ensure all components are selected for a complete installation. Restart your system after installation to apply changes. These tools enhance functionality, enabling features like RGB lighting control, fan management, and system monitoring for optimal performance.
7.3 Updating Firmware and BIOS
To update the firmware and BIOS for the Gigabyte B650 Gaming X AX motherboard, download the latest version from Gigabyte’s official website. Save the update file to a USB drive and ensure the motherboard supports BIOS updates via Q-Flash Plus. Enter the BIOS, navigate to the Q-Flash Plus section, and select the update file. Follow on-screen instructions to complete the update. Do not interrupt the process. Once done, restart your PC to apply the new BIOS version, ensuring optimal performance and compatibility with the latest hardware and software.